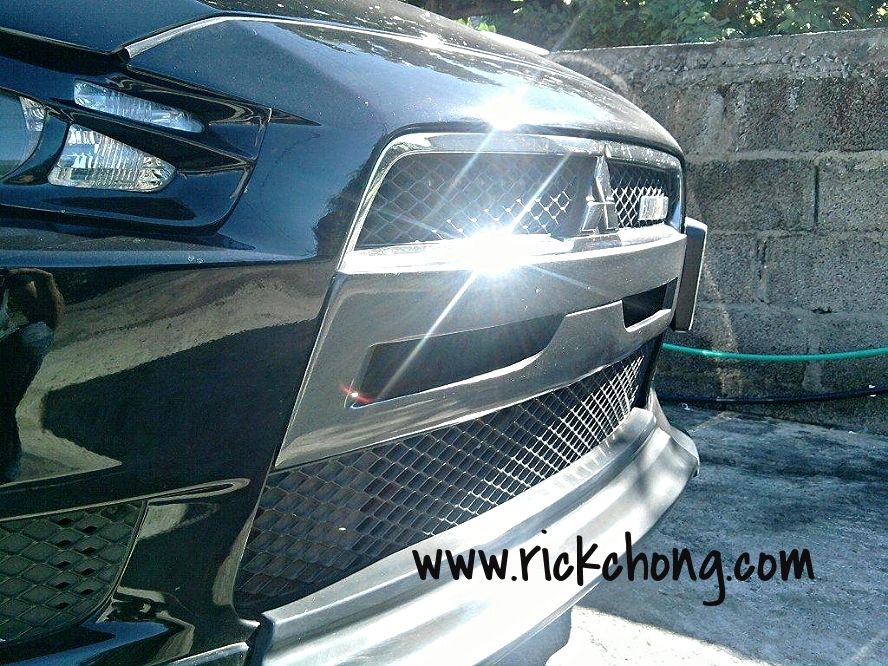
2008 To 2015 Mitsubishi Lancer Gts Es Custom Front Bumper Nose Overlay X Style on 2040-parts.com
SG, Singapore
|

 CUSTOM MADE & DESIGNED BY SCORPION...BUY ONLY THE REAL THING DON'T SETTLE FOR CHEAP FAKE COPY ! FRONT BUMPER OVERLAY EVOLUTION X LOOK ! FOR MITSUBISHI 2008/2009/2010/2011/2012/2013/2014 LANCER 4DOOR, SPORTBACK HATCHBACK. Note: Item Will Not Fit Lancer That Came With The Front Bumper Large Chrome Lining . Same Chrome Lining Of The Ralliart Lancer .
*Excellent Quality *Self Adhesive *Simple & Easy Mod
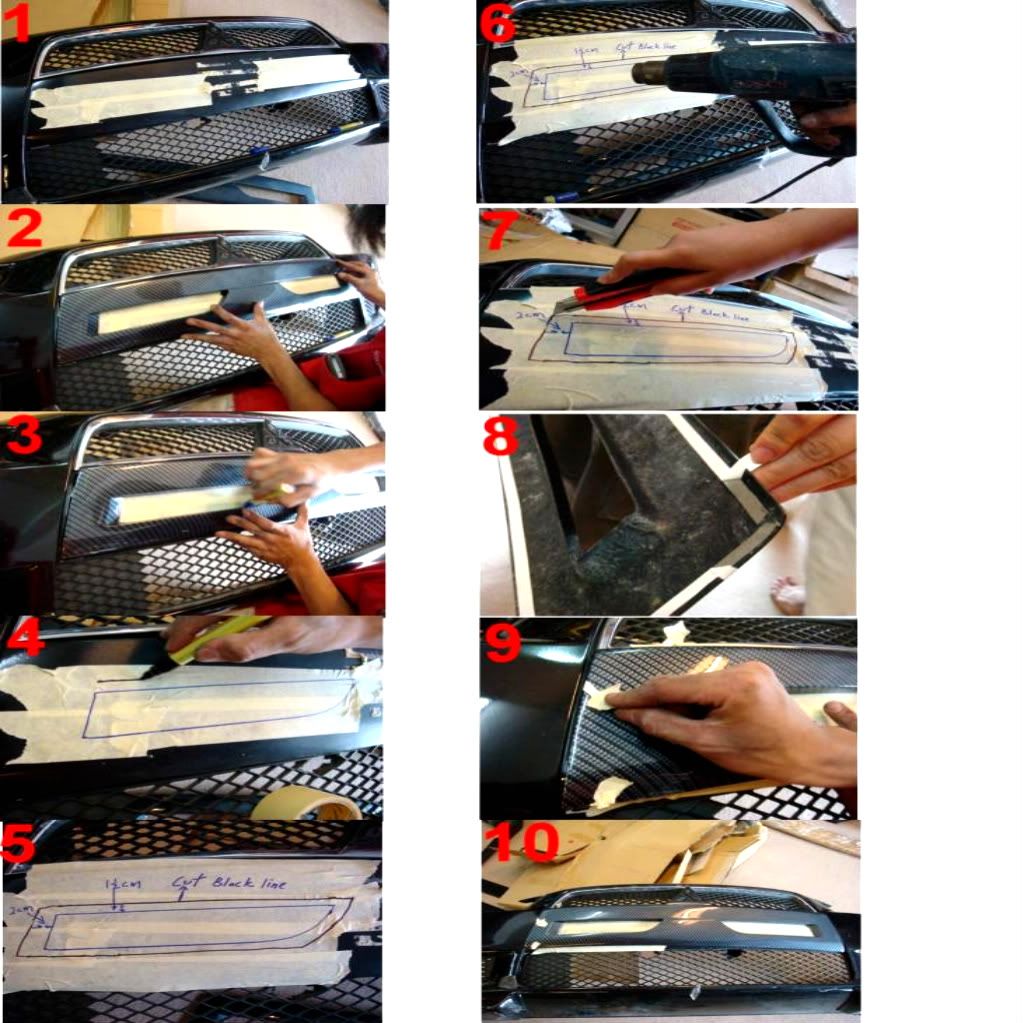
Installation Guide : You Can D.I.Y But Bodyshop Installation Is Recommended - Do not require to remove the front bumper ! Installation of the EVO X Style Front Nose Overlay is by Industrial strength 3M tape ,for added security Silicons Adhesive Is Recommended. For the EVO X Front Nose Look you need to cut 2 holes on the install area of the front bumper(Some cars came with Styrofoam behind the front bumper that required to remove). Step 1) Stick masking tape on the area shown. Step 2) Place the Scorpion Front Nose Overlay in place. Step 3) Mark out the 2 holes by using the Scorpion Front Nose Overlay, trace the holes with "BLUE" marker pen by placing the Front Nose Overlay on shown location. Step 4 & 5) After marking out ,draw another bigger size hole using "Black" marker pen. Measure and extent the top & bottom line to 1/2" or 1.5cm . Measure and extent the two sides line to 1" or 2.5cm. Step 6) Drill small pilot holes 1" to 2" apart on the "Black" marker line. Step 7) When done use a big & strong enough pen knife to cut out the holes of the "Black " marker line, it easier than it look actually the plastic bumper is quite soft. Step 8) Make sure all contact surfaces is clean & dirt free .On the back of the Nose Overlay remove a small portion of the 3M tape.(For added security you can apply adhesive sealant on the Front Nose to bumper contact surface) . Step 9) Put the Nose Overlay in place , pull & remove the remaining 3M tapes. Step 10) You're Done ! If you choose to applied adhesive sealant use masking tape to tape over both item for at least 3 hrs before driving ,depending on the temperature during installation if possible leave it over night for the silicon adhesive to cure.
|


