 |
|
|
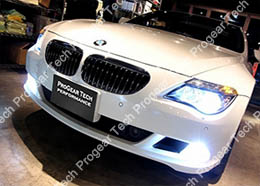
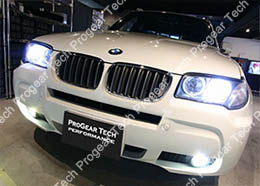
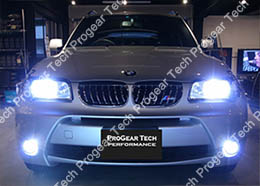
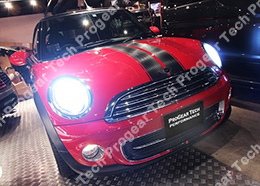
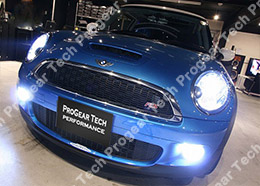
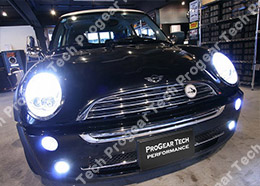
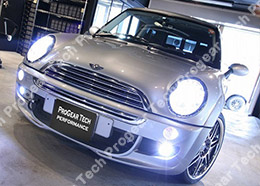
For Vehicles with factory D2S/D2R/D2C HID Xenon Headlights BMW: E46 M3(E46) E39 E60 E61 E63 E64 E65 E66 M5(E60/E61) M6(E63) X3(E83) X5(E53) Z4(E85/E86) Z8(E52) Mini : R50 R53 Mini Copper II Mini One II
The compatibility list may not be exhausted but it will fit vehicles with factory D2S/D2R/D2C HID Xenon headlamps. If you not sure the fitment, please refer your "Car Manual" or Bulbs Model Guide here
Package includes: Two(2) x D2S HID Xenon replacement bulbs (no modification, fit all D2S/D2R/D2C, money back guarantee) Color Temperature: 6000K 18-month Warranty.
|
|
|
|
|
|
|
|
|
High quality HID Xenon replacement bulbs Our D2S's features:
Our bulbs use Alloy-steel base frame which can resist higher pressure and temperature than cheap thermal plastic
Top grade Germany's burners: have straight longer neck but china's are flat
Luxes test: Our product 41600 Lux, other only 32500 Lux (actual result subject to headlight's condition) |
|
|
|
|
|
|
|
|
New Revolution HID Bulbs
18-month Warranty. |
|
|
|
|
|
|
|
|
Bulb color choices? The color temperature is purely a scale to measure the color of the light. The higher the color temperature (degrees K) doesn't mean a higher light intensity (lumen). The reality is the higher up the K value the lamps are the less bright they become. The brightest shine are 4300K, 6000K and 8000K, amid 6000K is close to the sunlight and most comfortable to our eyes, also benefiting for the safe driving.
** Color Temperature 4300K/8000K/10000K/12000K are available too Please inform us if you need color temperature other than 6000K
|
|
|
|
|
|
|
|
|
|
Package included: Two(2) x D2S HID Xenon replacement bulbs (no modification, fit all D2S/D2R/D2C, money back guarantee) Color Temperature 6000K 18-month warranty Box packing The compatibility list may not be exhausted but it will fit vehicles with factory D2S/D2R/D2C HID Xenon headlamps. If you not sure the fitment, please refer your "Car Manual" or Bulbs Model Guide here
|
|
|
Our featured bulbs: • High quality Germany Quartz ArcTM UV-Stop Burner • Plug and Play replacement and upgrade • 40% less power consumption than halogen bulbs • 5 times light intensity than halogen Light bulbs • TUV, E4, CE, RoHS, ISO 9001:2000 • Great price but High quality as expensive Philips and Orsam bulbs. • Assembled in Japan ** Color temperature 4300K/8000K/10000K/12000K are available too Please inform us if you need color temperature other than 6000K |
|
Full frame connectors better heat dissipation |
Product Datasheet: Type: D2S Technology: High Intensity Discharge Finishing: Quartz ArcTM UV-StopTM coating Power Input: 12V Normal wattage: 35W(OEM standard) Application: Headlights Lifespan: B3/Tc = 5000h/10000h Luxus: 41600
|
|
|
|
|
|
|
|
Original Box Packing
|
|
|
|
|
|
|
|
|
General Installation Guide
When putting the igniter back on, make sure it's snug and when you try to pull it or fiddle with it, it shouldn't move. So just make sure the igniter is put back on properly. Otherwise, bulb burnt! |
|
|
|
|
|
|
|
|
These D2S replacement bulbs are perfect for the consumer who is looking for a better lighting output and a more aggressive look for their rides.
|
|
|
|
|
|
|
|
|
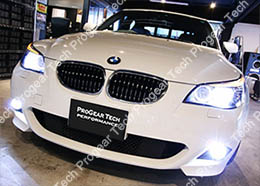
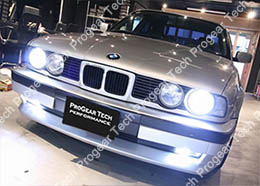
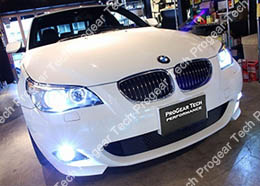
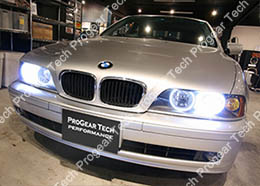
Below are some feedbacks received from our satisfied customers |
|
|
|
|
|
|
|
|
Scheduled Delivery Time: Thanks for your purchase! We appreciate great buyer like you! If you have any question about the scheduled delivery time, please contact us directly. Our expert team will swiftly diagnose the issue and must make every effort to solve it!. Leaving negative feedback or filing a dispute prior let us the chance to correct the problems does nothing towards your satisfaction but waste your time! We always put our customers first ! |
|
|
|
|
|
|
|
|
Shipping and handling: • Your purchase will be shipped within 2 WORKING days via e-Express (US, UK, Australia, Canada, Germany, Norway, Russia, France, Republic of Korea, Vietnam, Singapore and New Zealand) or Hong Kong Post Registered International Airmail (web tracking here). Estimated Delivery Time: * Please note that EDT are excluding Saturday, Sunday and Public Holidays (HK). * 4-8 WORKING days to all US addresses. * 6-12 WORKING days to UK and Australia. * 7-14 WORKING days to Singapore, Thailand and most Asia countries. * 11-30 WORKING days to Europe and the rest of the world. **If you item didn't arrive within estimated delivery time, please contact us directly at
• No Hidden Cost! All import duties, taxes and charger are included. • We do offer EMS, UPS, FedEx and DHL express shipping services. Please do contact us first.
|
|
|
Payment:
• We accept all major credit and debit cards. PayPal account IS NOT NECESSARY! • Due to security reason, your merchandise will ship to the address recorded in payment card ONLY. • If you want to cancel the order or have a problem with the payment card, please contact us directly. • Please note that ebay system strictly will open a dispute for unpaid order automatically when buyer didn’t pay 4 days after purchase. An unpaid item record will be added to buyer's A/C if still not pay on next 4 days. |
|
|
Warranty: Buy confidence. Your purchase come with 18-momth warranty of all factory defects. We will issue replacement free of charge if any components fail within warranty period. Buyers may need send back the defective components to us for testing but please do contact us first (or may go through the Troubleshooting to verify the problems first). Any Damage caused during installation and misuses are not considered as product deficiency and will not be covered by warranty.
Return: |
|
|
|
|
|
|
|
|
Enquires: Troubleshooting How to make sure the HID kit will work properly every time. Turn the engine on first, before turning on the HID kit. Do not turn the HID on and off frequently. Do not install the HID ballasts near the engine nor anywhere the water can easily get onto. Make sure the connectors of the HID kit are tightly secured to the stock harness. Make sure car battery is in WORKING condition. HID ballast will stop working when input voltage less than its acceptable level. Bulbs flicking during operation Disconnect all the POWER connectors to the ballasts. Clean all connectors with alcohol. Wait more than 5 - 15 minutes to reset ballast micro-processer and then reconnect the connectors. Inspect all the connections between ballasts and vehicles wire harness. Inspect all the connections between igniter module and HID bulb modules. Inspect the fuses. Use at least 25 Amp fuse if both lights share the same fuse; Use at least 15 Amp fuse for each light if lights use separate fuses. Inspect the ballast’s power input socket, the 2 prongs inside the socket may need bending a bit to make a tight connection thus avoid bad contact. Determine if additional high-power relay wirings are required to provide sufficient power to the HID systems (Applicable to NON-CANBUS car only). Do not loss mating or mis-wiring connections. Disable DRL (Daytime Running Light) and/or Auto On/Off Headlamp features. On-board computer displays light failure warnings when the HID lights are turned on. Purchase the "CANBUS HID conversion kit". HID bulb modules won't fit. Double check to see if you purchased the appropriate bulb type for your vehicle. You can refer to your vehicle’s owner’s manual for the bulb size. Some vehicles require an adaptor to hold the bulb in place. HID turns on then both sides go out. There is a possibility that the fuses are blown. Please check your fuses box according to your vehicle's user manual and upgrade the stock 15 Amp or 20 Amp headlight fuse to 25 Amp or up. The 25 Amp fuses are 100% safe for your vehicle and will not cause damage to your vehicle’s electrical system. You may need Error Chancellor or Decoder if your car come with CANBUS computer.; HID will only work when the high beam is turn on. This particular situation commonly happens with the H4/9003/9004/9007 HID conversion kits because it has three prongs plug rather than just "+" and "-". Make sure you have plugged those three wires correctly to their positions. Usually the combination is Yellow, Black and Red. HID will shut down itself sometimes. Inside the HID ballast, there is a micro chip which is used to detect whether there is any potential problems, such as sudden high impulse or shortage of power input from battery or extremely high heat will trigger the self-protect and shut the ballast off temporarily. It takes about 5 - 15 mins for the micro chip to reset itself and the ballast will be working again. Once this happens, please turn off the HID and wait about 5 to 15 mins. If the lights vibrate while driving Ensure that the bulbs are securely installed in the light housing socket. DC (direct current) ballasts are inevitable have vibration. Replace DC ballasts with AC (Alternating current) ballasts Determine if additional high-power relay wirings are required to provide sufficient power to the HID systems ( Applicable to NON-CANBUS car only). Inspection Procedure: Please check the car battery. Check all connections between the bulb & ballast. Check the vehicle battery terminal. HID works when the engine is off, but if turning on the engine the HID will turn off itself. For some vehicles such as BMW, Mercedes etc... they have CANBUS onboard computers to restrict outsource components such as aftermarket HID conversion kit or aftermarket MP3 Players. Therefore, the only way for such cars to install the HID kit is to install a Error canceller/Decoder cable or with a CANBUS capable HID conversion kit.
One or both light can't ignite initially. Bulb turns off after the vehicle just starts. HID system requires a steady level of battery voltage of at least 12V initially. “Auto Switch-On” and Daytime Running Light functions draw power from the vehicle battery which causes the HID system to fail to initially ignite. If you have Daytime Running Light, disconnect the fuse or wiring of Daytime Running lights only. Please contact your vehicle dealer/manufacturer for more information.
If you have "Auto Switch-On" Headlight function, ensure to switch the function to "Manual Switch-On"
headlight mode. Determine if additional high-power relay wirings are required to provide sufficient power to the HID systems( Applicable to NON-CANBUS car only). Install a Error canceller/Decoder cable or replace it with a CANBUS capable HID conversion kit. Only one light works, even though both lights are installed exactly the same. 1. The polarity (positive & negative) of one side might not match with the factory wiring harness. 2. Fuse might be blown on this side.
3. Malfunctioned parts. 1. Swap the ballasts connection; connect ballast from non-working side to working side to verify the health of bulb and socket/relay harness. If the problem still happens at that non-working side, it may the bulb and/or socket/relay harness cause the problem. 2. Swap again the bulb from non-working side to working side to verify the health socket/relay harness. If the bulb work fine. It is the socket cause the problems 3. Determine if additional high-power relay wirings are required to provide sufficient power to the HID systems( Applicable to NON-CANBUS car only) 4. Install a Error canceller/Decoder cable or replace it with a CANBUS capable HID conversion kit. 5. You may need extra grounding (to car frame) on that side. It is a common problem from ageing wiring and "common grounding design" of headlight sockets on some vehicles. 6. Disable DRL (Daytime Running Light) and/or Auto On/Off Headlamp features. The colors or lighting effects of the two bulbs are different. The leveling of the headlight housings are not even, adjustment of the headlight leveling is needed. For new bulbs, there are chances that the colors are different for first couple hours of burning. The color will become normal once it’s been run for a short period of time. Inspection Procedure: Inspect for damage in the light housing. Clean the lens of the light. Inspect the positioning of lights to ensure both are at the same angle to the road. 1. Swap the faulty bulb from fault side to working side to verify the health sockets/ballasts. If that bulb work fine. It is the sockets/ballasts cause the problems. 2. You may need extra grounding (to car frame) on that side. It is a common problem from ageing wiring and "common grounding design" of headlight sockets. 3. Disable DRL (Daytime Running Light) and/or Auto On/Off Headlamp features. The HID bulbs changes color when first turn on. This is totally normal. At the beginning, the ballasts are storing the power from the battery of the car. Since the power has not been stabilized yet, the bulbs might have different colors or even flicker a little bit. However, as soon as the power is stabilized by the ballast, the bulbs will become normal. The HID works initially but starts to flicker sometimes. There is a possibility that it might be caused by either damaged bulbs or ballast. Inspection Procedure: Disconnect all the POWER connectors immediately. Clean every connector with alcohol. Wait more than 5 - 15 minutes then reconnect or reinstall every connector. Then check all the connection between ballast and factory harness (Power Source); check all the connection between igniters and bulbs (yellow silicone connectors); check your upgraded fuse, they must be 25A minimum. Remember, every connector have to be 100% well connected to each other Troubleshoot by: Check all connections between the bulb and ballast. Check the bulb that does not work to make sure there are no loose wires. Check the fuses. Use at least 25A fuse if the stock 15A fuse blows. 1. Swap the ballasts connection; connect ballast from non-working side to working side to verify the health of bulb and socket/relay harness. If the problem still happens at that non-working side, it may the bulb and/or socket/relay harness cause the problem. 2. Swap again the bulb from non-working side to working side to verify the health socket/relay harness. If the bulb work fine. It is the socket cause the problems 3. Determine if additional high-power relay wirings are required to provide sufficient power to the HID systems( Applicable to NON-CANBUS car only) 4. Install a Error canceller/Decoder cable or replace it with a CANBUS capable HID conversion kit. 5. You may need extra grounding (to car frame) on that side. It is a common grounding problem from ageing wiring and "common grounding design" of headlight sockets. 6. Disable DRL (Daytime Running Light) and/or Auto On/Off Headlamp features. One light is brighter than the other. Inspect for damage in the light housing. Clean the lens of the light. The leveling of the headlight housings are not even. Inspect the positioning of lights to ensure both are at the same angle to the road, adjustment of the headlight leveling is needed. Swap the failing bulb module to the working side to see if the problem remains. If the failing light now works, the Ballast and/or Igniter may be malfunctioned. If the problem still persists on, the bulb may be failed. Disable DRL (Daytime Running Light) and/or Auto On/Off Headlamp features. Lamp Has Been Operating : Cool Down Time Insufficient (Hot Restrike) When HID lamps are operating and the supply voltage is cut or interrupted, the lamps will require a period of time to cool and re-establish optimum starting conditions. It require from four to eight minutes cool down time. The restart time varies with the degree of ventilation, ambient temperature, and draft conditions. The time from cool to able to start condition can realistically range up to 20 minutes. However, some newly design ballasts can overcome such issue and no cool down time needed. |
|
|
|
|


